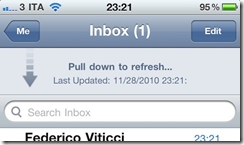
I always liked the simplicity in iPhone for refreshing a list of various feeds, for instance email, tweet, RSS etc. Basically when you get to the top of the list, you simply keep pulling and the app will check for the latest items:

I wanted something similar in my WinPhone application, and ventured out to make this. You could probably go and argue now that Windows Phone 7 shouldn’t be copying ideas from other phones but be its own, which is a somewhat fair argument, but when something just works, it just works. So yes this post is about totally ripping of an iPhone idea. I’ll admit that 
If you don’t care how this was done, just jump to the bottom to see the result in action, and/or download the bits.
Anyway, luckily creating a control like this wasn’t too hard. It starts with inheriting from the ListBox control which has all the list features needed. It also supports pulling beyond the contents of the list and when you let go, it “pops back” to the top item. So all I need to do, is :
1. Find a way to place an item in this “outside area”.
2. Detect that the user is pulling the list out in this area.
Placing the element in the outer area proved to be really simple. The ListBox template is basically just a ScrollViewer with an ItemsPresenter inside it. So all we need to do is place a grid with the contents on top of the ItemsPresenter with a negative vertical margin:
<ControlTemplate TargetType="local:RefreshBox">
    <ScrollViewer x:Name="ScrollViewer" ...>
        <Grid>
            <Grid Margin="0,-90,0,30" Height="60" VerticalAlignment="Top" x:Name="ReleaseElement">
                <!-- content goes here -->
            </Grid>
        </Grid>
        <ItemsPresenter/>
    </ScrollViewer>
</ControlTemplate>
Sprinkle a little visual states in that content, and we would be able to change the message when we detect the user has been pulling beyond the threshold.
The first thing we do is get a reference to the ScrollViewer and the ReleaseElement during OnApplyTemplate(), and listen to MouseMove (the event that causes the scrolling) and ManipulationCompleted (triggered when the user lets go of the screen).
public override void OnApplyTemplate()
{
    base.OnApplyTemplate();
    ElementScrollViewer = GetTemplateChild("ScrollViewer") as ScrollViewer;
    if (ElementScrollViewer != null)
    {
        ElementScrollViewer.MouseMove += viewer_MouseMove;
        ElementScrollViewer.ManipulationCompleted += viewer_ManipulationCompleted;
    }
    ElementRelease = GetTemplateChild("ReleaseElement") as UIElement;
    ChangeVisualState(false);
}
In MouseMove we can then check the VerticalOffset of the ScrollViewer. You would think this offset is negative, but it gets clamped at 0, so we can’t use that. Instead by calculating where the ReleaseElement is physically located gives us an idea of how far we pulled:
private void viewer_MouseMove(object sender, MouseEventArgs e)
{
    if (VerticalOffset == 0)
    {
        var p = this.TransformToVisual(ElementRelease).Transform(new Point());
        if (p.Y < -VerticalPullToRefreshDistance) //Passed thresdhold : In pulling state area
        {
            //TODO: Update layout//visual states
        }
        else //Is not pulling
        {
            //TODO: Update layout/visual states
        }
    }
}
Similarly, when you let go of the screen we make the same check and raise an event if necessary:
private void viewer_ManipulationCompleted(object sender, ManipulationCompletedEventArgs e)
{
    var p = this.TransformToVisual(ElementRelease).Transform(new Point());
    if (p.Y < -VerticalPullToRefreshDistance)
    {
        //TODO: Raise Polled to refresh event
    }
}
So here’s that this looks like….
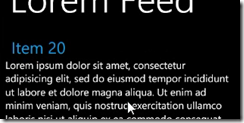
Scrolled to the top of the list:

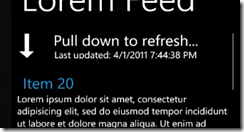
Pulling slightly down on the listbox beyond the top item:

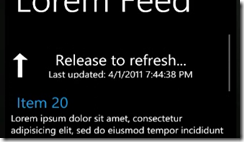
Pulling all the way down: Message tells you to let go to refresh:

And here’s what that look like in action:
You can download the code and binary for a fully skinnable control/reusable below here:
Source : SharpGIS.Controls.RefreshBox_source.zip (32.31 kb)
Binary : SharpGIS.Controls.RefreshBox_binary.zip (6.48 kb)
UPDATE: If you are using v7.1 (Mango), the above approach will only work if you set ScrollViewer.ManipulationMode ="Control" on the RefreshBox. See herefor details.