Most of the tutorials at the Holographic Academy starts out with a starter-project with a bunch of stuff already set up for you. If you’re new to Unity and/or holographic development, I found that a little bit “cheating” and wanted to know how to do things “from scratch”, to property understand it. I thought I would share my findings in a set of blogposts – they wiill serve as notes for myself, but figured it might be useful for others as well. If something is wrong or you know a better way, please comment in the comment section.
I have all the steps recording in a video at the bottom, but for those who like to read and understand the steps, I’ll go with that first. So lets get started.
First launch Unity and create a new project. Name it whatever you’d like.
After launch, you’ll see in the Hierarchy view a “Main Camera” and a “Directional Light” object.
First we’ll configure the camera for Unity. Keep the name “Main Camera”. From my understanding this is what automatically becomes the camera controlled by your HoloLens. But we have to configure it to be placed at the center of the world.
Select the camera in the hierarchy and In the inspector set the position and rotation to all zeros:
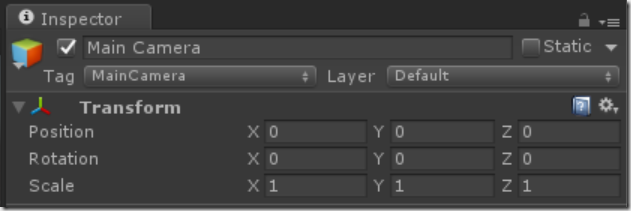
Next we need to set the camera to render “nothing” as black. By default it renders blue skies, but since “black” renders as transparent and we want to see the real world around our holograms, we set “Clear Flags” to “Solid Color” and “Background” to “Black”:

It is also recommended to set the Near Clipping Plane to 0.85 m. This prevents users from getting “too close” to holograms and get all cross eyed from it. It can be very uncomfortable for people, but feel free to set it to 0.1, to get really up close to your holograms.
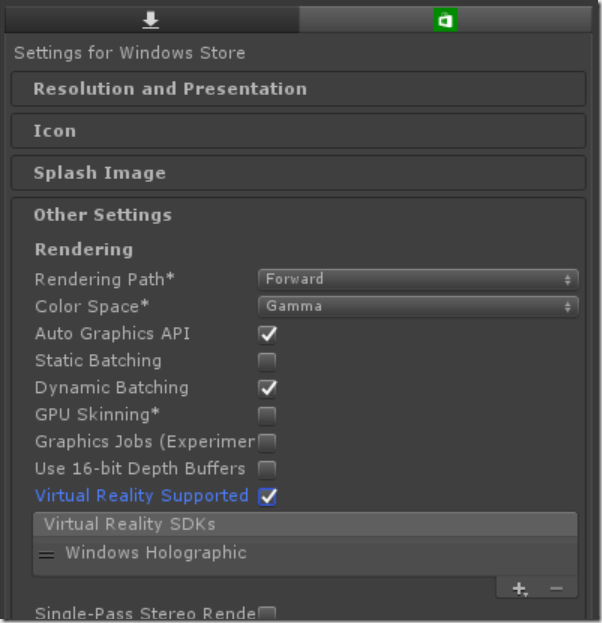
Next we need to configure the app for Virtual Reality. Go to Edit –> Project Settings –> Player. Click the green “Store Logo” tag, expand “Options” and check off “Virtual Reality Supported”. You should then see “Windows Holographic” listed under the “Virtual Reality SDKs” list.
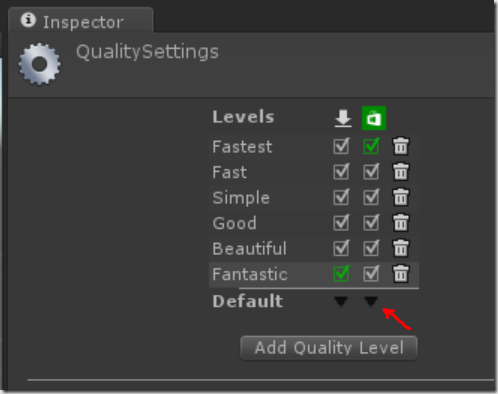
Lastly, we configure the app to run with the fastest rendering possible. To go Edit –> Project Settings –> Quality. Under the green “Store Logo” tag to the left of “Default” click the little black dropdown triangle (highlighted with the red arrow blow) and select “Fastest”. You should see “Fastest” now be green in the first line under the store logo.
Now at this point we’ve done all the steps for configuring your Holographic app. To recap:
- Place camera at 0,0,0, name it “Main Camera” and set the background to solid color black.
- Enable the app for Virtual Realtiy
- Set quality settings to “Fastest”
At this point we can save the app, and build a Windows Store Visual Studio project to deploy to the HoloLens, but since we haven’t added anything to the scene, it would be a boring app, so let’s do that first before creating the visual studio project.
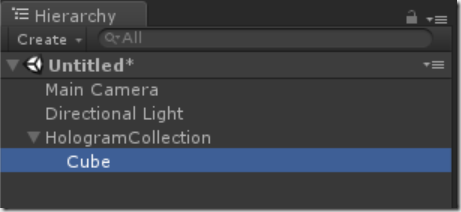
Right-click inside the Hierarchy Panel, and select “Create Empty”. You should see a “GameObject” be created. Right-click it at click “Rename”, and name it something like “HologramCollection”. Double-check the transform settings and sure position is placed at 0,0,0.
Next select the HologramCollection object, and right-click it. Select “3D Object –. Cube”. A new cube should be created under the collection, and the Hierarchy panel should look like this:
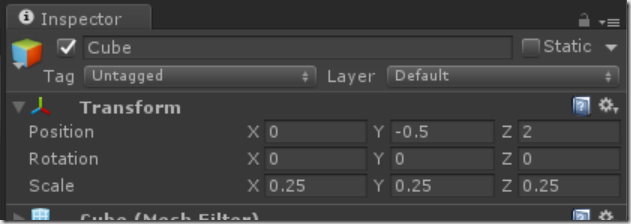
Select the Cube, and in the position, set it to 0, –0.5, 2. This means “place it 0.5 meters below the camera, and two meters in front. When the app starts, this is where the hologram will be placed relative to the HoloLens. The cube is 1x1x1 meter. That’s a little bit large for a Hologram, so set the scale to 0.25 for all 3 values, to make it .25m on each side.
That’s it for setting up our scene. Next lets create and build it. First go to “File –> Save Scene as…” and give it a name like “Main Scene”.
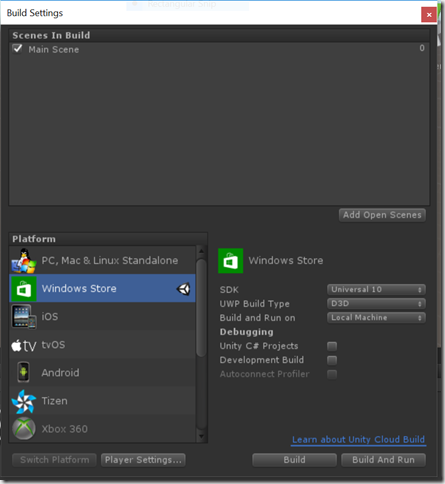
Next go to “File –> Build settings…”. For platform select “Windows Store”. SDK to “Windows 10”, UWP Build Type to “D3D” and click “Build”.
Lastly click “Add open scenes” and ensure the scene you just saved got added to the list at the top.
You’ll be asked for a folder to create it in. Create a folder in your project called “App”, and select the folder. The the project is done being created (it takes a while the first time), go into the app folder and open the Visual Studio solution.
Next, set the build architecture to x86, and select either the holographic emulator, or if you have a device select the “Remote Machine” and enter the IP (Tip: From within the hololens open the start menu and ask Cortana “What is my IP”), or plug the device in with USB and select “Device”.
Hiit F5 and start your first holographic app!
All the steps are also shown in the video below. At the end of the video you’ll see the app running inside the HoloLens.
Enjoy!