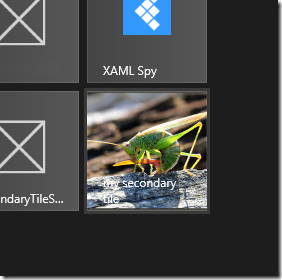
Often when you are creating a secondary tile in Windows 8, it will be based on images coming from the internet. However a requirement of secondary tile images are that they need to be stored locally. I initially had some problems getting this working right and the streams closed correctly for this to work, so here’s the code for other to use and save the hazzle:
public async static Task CreateSecondaryTileFromWebImage(
string tileId, Uri imageUri, string shortName, string displayName,
string arguments, Rect selection)
{
//Download image to LocalFolder and use the tileId as the identifier
string filename = string.Format("{0}.png", tileId);
HttpClient httpClient = new HttpClient();
var response = await httpClient.GetAsync(imageUri);
var imageFile = await ApplicationData.Current.LocalFolder.CreateFileAsync(filename, CreationCollisionOption.ReplaceExisting);
using (var fs = await imageFile.OpenAsync(FileAccessMode.ReadWrite))
{
using (var outStream = fs.GetOutputStreamAt(0))
{
DataWriter writer = new DataWriter(outStream);
writer.WriteBytes(await response.Content.ReadAsByteArrayAsync());
await writer.StoreAsync();
writer.DetachStream();
await outStream.FlushAsync();
}
}
//Create tile
Uri image = new Uri(string.Format("ms-appdata:///local/{0}", filename));
SecondaryTile secondaryTile = new SecondaryTile(tileId, shortName, displayName, arguments, TileOptions.ShowNameOnLogo, image);
secondaryTile.ForegroundText = ForegroundText.Light;
await secondaryTile.RequestCreateForSelectionAsync(selection, Windows.UI.Popups.Placement.Above);
}
Often this is enough, but there is still a small problem. What if the image is very light, and the text you display on top of it is white, thus drowning in the background image? You could set the tile text to black, but then what happens if the image is dark? And if it has a lot of texture in it, the text still gets very unreadable. Since you might not know up front what the image looks like, whether it’s dark or bright, or textures, we will need a way to ensure the text will still look good on top of the image.

Unfortunately full WriteableBitmap support in WinRT isn’t there to help us out modifying the image, but we do get low-level access to the pixel buffer of the image, so we could fairly simple darken or brighten the bottom a bit to ensure the image looks good as a backdrop for the text.
I wrote a little utility that loads the image, gradually darkens the bottom 40% of the image before saving it back. I’ve found that doing a slight graduated darkening on photos isn’t too noticeably, while making the text in front of it much more readable. So with out further ado, here’s my simple image pixelbuffer modifier:
private async static Task DarkenImageBottom(string filename, string outfilename)
{
    var file = await ApplicationData.Current.LocalFolder.GetFileAsync(filename);
    BitmapDecoder decoder = null;
    byte[] sourcePixels = null;
    using (IRandomAccessStream fileStream = await file.OpenReadAsync())
    {
        decoder = await BitmapDecoder.CreateAsync(fileStream);
        // Scale image to appropriate size
        BitmapTransform transform = new BitmapTransform();
        PixelDataProvider pixelData = await decoder.GetPixelDataAsync(
            BitmapPixelFormat.Bgra8,
            BitmapAlphaMode.Straight,
            transform,
            ExifOrientationMode.IgnoreExifOrientation, // This sample ignores Exif orientation
            ColorManagementMode.DoNotColorManage
        );
        // An array containing the decoded image data, which could be modified before being displayed
        sourcePixels = pixelData.DetachPixelData();
        fileStream.Dispose();
    }
    if (decoder != null && sourcePixels != null)
    {
        for (uint col = 0; col < decoder.PixelWidth; col++)
        {
            for (uint row = (uint)(decoder.PixelHeight * .6); row < decoder.PixelHeight; row++)
            {
                uint idx = (row * decoder.PixelWidth + col) * 4;
                if (decoder.BitmapPixelFormat == BitmapPixelFormat.Bgra8 ||
                    decoder.BitmapPixelFormat == BitmapPixelFormat.Rgba8)
                {
                    var frac = 1 - Math.Sin(((row / (double)decoder.PixelHeight) - .6) * (1 / .4));
                    byte b = sourcePixels[idx];
                    byte g = sourcePixels[idx + 1];
                    byte r = sourcePixels[idx + 2];
                    sourcePixels[idx] = (byte)(b * frac);
                    sourcePixels[idx + 1] = (byte)(g * frac);
                    sourcePixels[idx + 2] = (byte)(r * frac);
                }
            }
        }

        var file2 = await ApplicationData.Current.LocalFolder.CreateFileAsync(outfilename, CreationCollisionOption.ReplaceExisting);

        var str = await file2.OpenAsync(Windows.Storage.FileAccessMode.ReadWrite);
        BitmapEncoder enc = await BitmapEncoder.CreateAsync(BitmapEncoder.PngEncoderId, str);
        enc.SetPixelData(BitmapPixelFormat.Bgra8, BitmapAlphaMode.Ignore, decoder.PixelWidth, decoder.PixelHeight,
            decoder.DpiX, decoder.DpiY, sourcePixels);
        await enc.FlushAsync();
        str.Dispose();
    }
}
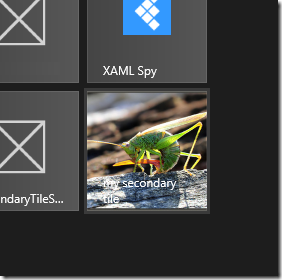
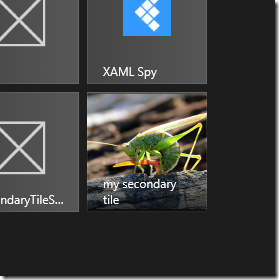
So we can call this utility prior to creating the secondary tile request. Compare the before(left) and after (right) here:


The image difference is barely noticeable, but the text is much more readable.
You can download the tile utility class and sample app here.